Background ads will take over the default background of your page and wrap around the content container. It will provide you with 3 different sections to add links.
- Top Skin (optional)
- Left Skin
- Right Skin
Background ads will take over the default background of your page and wrap around the content container. It will provide you with 3 different sections to add links.
Just like always, open Adning, go to Banners and click Add New.
The difference for Background Ads is that we will not use the default banner content options. Scroll down and find the “Auto Positioning” box and select the Background Takeover Ad option.
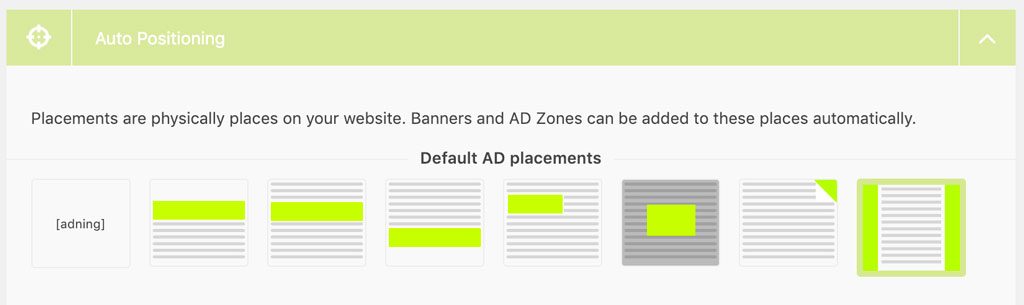
Once you selected the background takeover option the settings panel will open below.
First of all start by uploading the image you want to use as the background. Background ads can only be image files. Once you uploaded the image, save the banner and you will see a preview at the bottom of the settings box. The preview is not exactly what it will look like in real life but it gives you an idea.
Now the important part. As every site is different we cannot make this step the same for everyone. Next to the uploader, you see 2 other options:
The background container is the highest level full-width container for your website. By default, we use the <body> tag but if your theme has another full-width background container inside the <body> you will need to use that one.
If you don’t follow have a look at the following examples it hopefully explains the situation a bit more.
Example 1. In the first example, you see a default HTML structure where the <body> tag (white) is the highest level full-width container. Inside we have the smaller content container (grey).
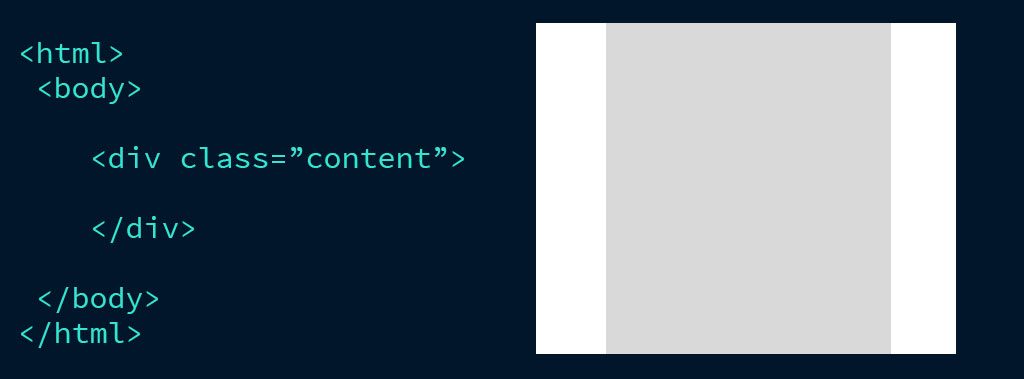
In this case, you can leave the Background Container value empty and you just need to define the Content Container name (unless it has a class called .content).
Example 2. In the second example, you see kind of the same HTML structure but the only difference is the .bg div (blue) which is another full-width container inside the <body> so it’s basically laying on top of the <body> (white, but in this case invisible) container.
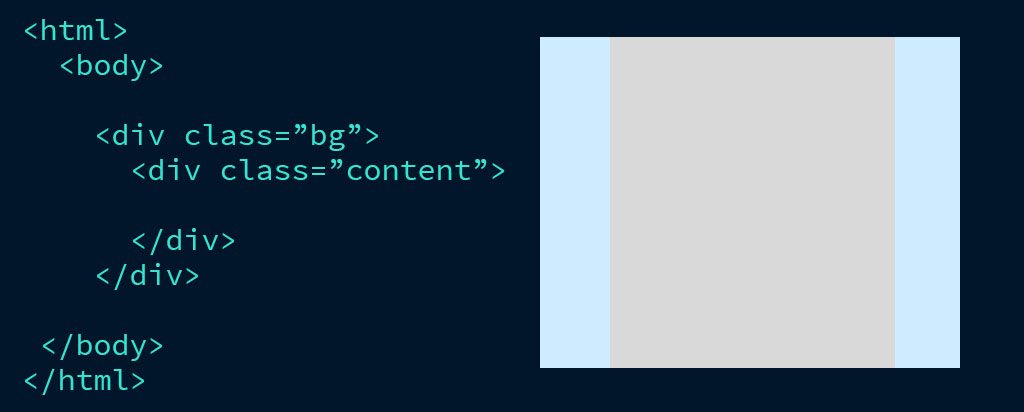
In this case, we need to define the Background Container value and let Adning know it should add the background ad to this specific container instead of the <body>.
So in this example, we would add .bg to the Background Container input field. Of course, this class (or ID) name will be different for your theme.
Same for the Content Container value.
Once you have the containers defined it’s time to save the banner, add it to a post or page (using the Display Filters) and click Save banner.
Open the post or page you selected and the background ad should be showing fine.
By default, a background ad will have a left and a right skin. In case you want to show a top skin just add the number of pixels you want the hight of the top skin to be to the Top Skin input field.
Every skin can have its own hyperlink. Just add the URLs you need to add to the URL input fields.
Just to give you an idea.